
Introduction to Image Editing - GIMP - The Image Manipulation Program
If you are interested in creating your own images for use in RightBooth, then you really need to learn how to use image editing software.
There are many applications on the market, they all offer different tools and they all come with different price tags, but in this article we will be focusing on a package called GIMP. Why GIMP? Well, first it is completely free! and second, it offers a fantastic range of image editing features that rival many of the pricey packages on the market. You really can't go wrong with GIMP and we use it all the time here at Aire Valley Software.
So go ahead and install it from the GIMP download site: https://www.gimp.org/downloads/
Note that this article is based on using GIMP 2.8.22. We will cover the basics of what you need to know about image editing
|
1 Loading, Converting and Saving Images
When you run GIMP, it will show an empty window with a menu above. To load an image into GIMP
To save the image...
|
|
Remember: In this process we have actually saved a copy of the original image and we have also converted it from JPG to PNG format during the save process.
|
2 Image Resizing
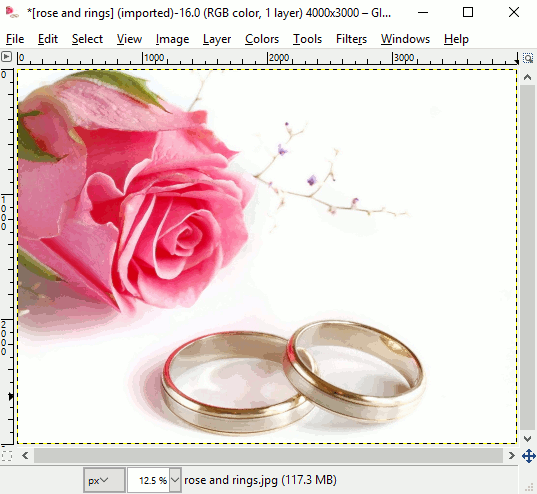
Images can be VERY big, especially photographic images captured with modern digital cameras so these days it is not unusual to see image sizes approaching 12000 x 12000 pixels. It is important to remember that RightBooth (or any other package for that matter) will not perform well if you start adding overly large images onto event screens so we recommend you resize large images and re-save them at a smaller size, Here you can see the rose and rings image is 4000x3000 pixels. Too big ! We want to use this as an event screen background. Our computer screen display is set to 1920 x 1080 pixels, so there is really no need for this image to be any bigger than 1920 pixels wide. We will use GIMP to resize it. |
|
If you'd rather not overwrite the original file then use Export As |

|
|
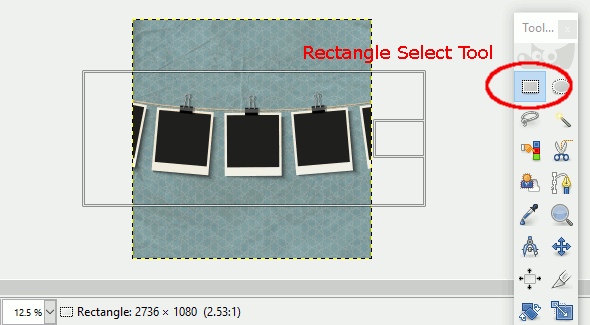
3 Image Cropping
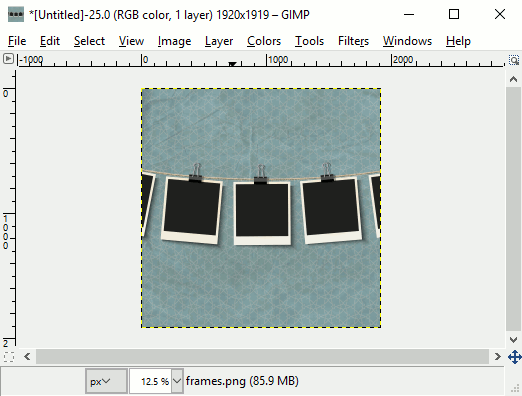
Here's another image we'd like to use as an event background. We've loaded it and resized it to 1920 pixels wide, but the height is 1919 pixels. This is far taller than our desktop display height which is only 1080 pixels so if we load this image into RightBooth it will be squashed up and distorted vertically to fill the screen. This image lends itself to being cropped by removing the areas above and below the hanging frames. We will use a GIMP Select tool for this purpose. |
|
|
|
This image is now the perfect size and shape to be used as an event background.
