
Providing A Choice Of Print Layouts
Updated: November 2021
The Scenario
You are planning a photo event using RightBooth and you want to let your users choose from one of three photo print layouts for their photos.
Note. This article is based on providing three layouts, but you can actually offer any number of layouts to your user.
So how to do this?
The Scenario
You are planning a photo event using RightBooth and you want to let your users choose from one of three photo print layouts for their photos.
Note. This article is based on providing three layouts, but you can actually offer any number of layouts to your user.
So how to do this?
Step 1 - Create a Photo Capture and Print Event
- Run RightBooth
- Click the 'Create' button and choose 'Create a photo capture event'
- Follow the steps in the Wizard.
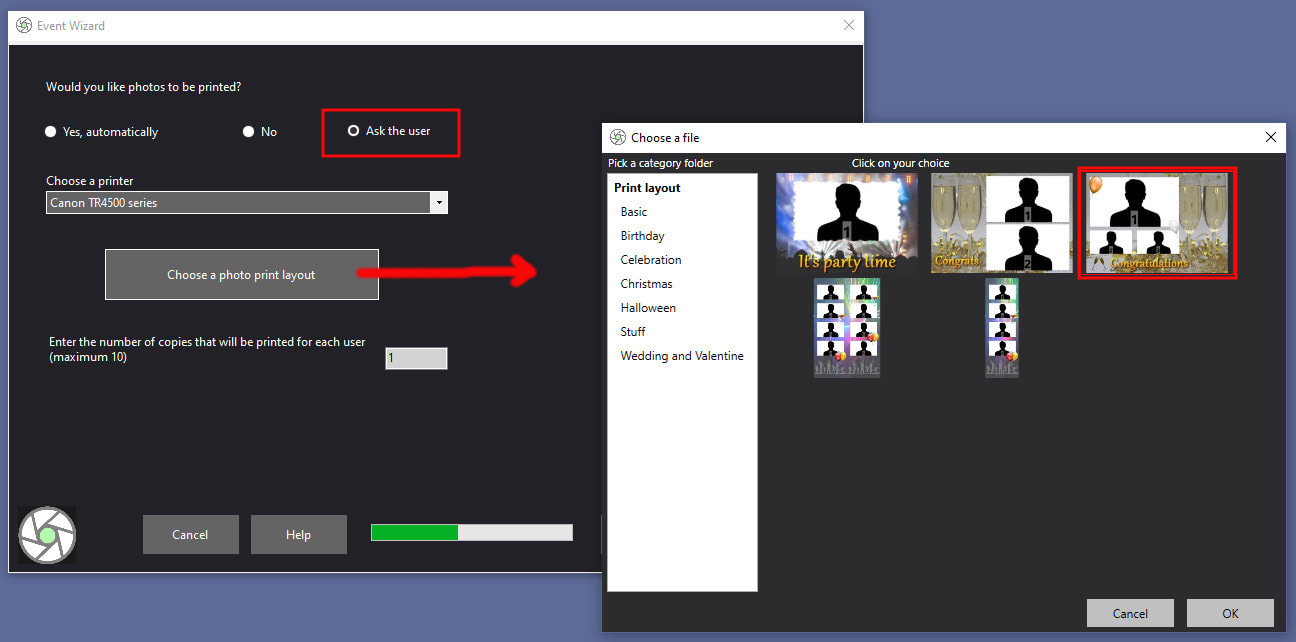
- When you reach the section asking you if you would like photos to be printed, choose 'Yes' or 'Ask the user' then you can choose one of the layouts that come pre-installed with RightBooth:
|
|
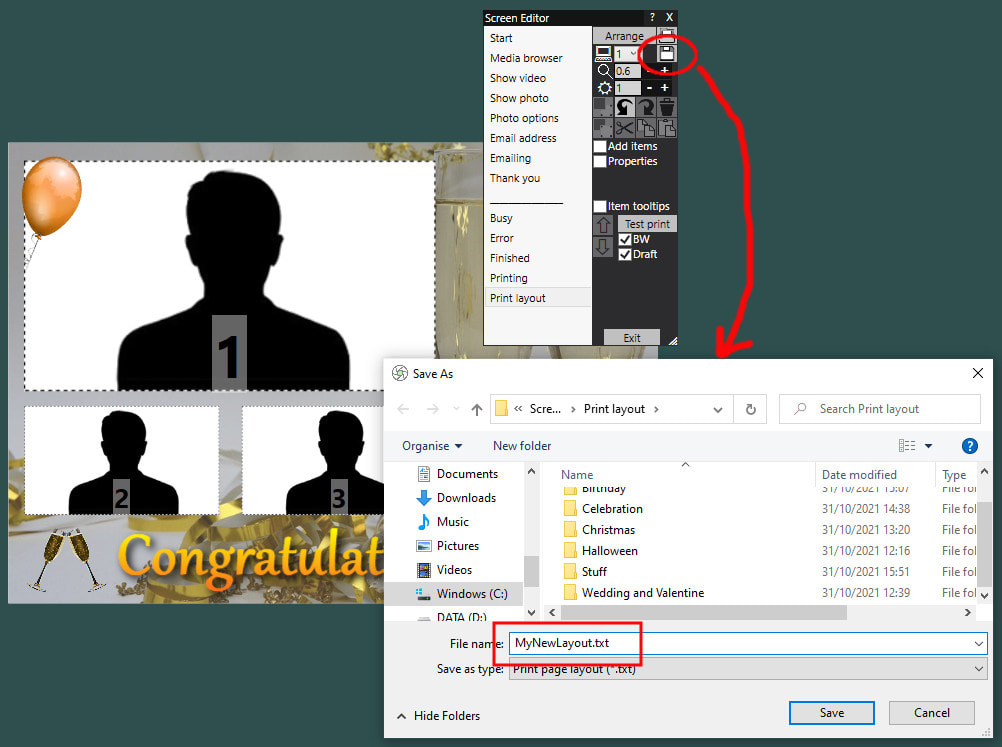
If you have redesigned the Print layout then you will need to save it to the RightBooth Print layout library. So in the Screen editor, on the Print layout screen, click the Save button on the Screen Editor Toolbox and save the layout with a filename of your choice. The layout will be saved into the RightBooth Media Library alongside the pre-installed layouts. In this screenshot I am saving the layout with the name MyNewLayout.txt...
Step 2 - Create Your Other Layout Files
You might need to create your other print layouts.
Step 3 - Add the Print layout choices onto a screen in your photo capture event
RightBooth version 7.6.1 has a new 'Print layouts' item in the Screen Editor that can be added to any of your event screens and can contain any number of your pre-designed photo print layouts.
Then when the event is playing, your event user may choose one of the layouts for RightBooth to use when printing their photos. Watch this video that explains how to do this:
You might need to create your other print layouts.
- Stay on the Print layout screen.
- Here you can re-design your layout and save it as a different filename each time into the Print Layout library.
Step 3 - Add the Print layout choices onto a screen in your photo capture event
RightBooth version 7.6.1 has a new 'Print layouts' item in the Screen Editor that can be added to any of your event screens and can contain any number of your pre-designed photo print layouts.
Then when the event is playing, your event user may choose one of the layouts for RightBooth to use when printing their photos. Watch this video that explains how to do this:
Congratulations. Job done!
You can now play the event, users may choose a layout, and then RightBooth will automatically use the chosen layout when printing the photos
You can now play the event, users may choose a layout, and then RightBooth will automatically use the chosen layout when printing the photos
