RIGHTBOOTH
  • Home
  • Products
  • Try
  • Feedback
    • Comments
    • User stories >
      • Mike Ridge
      • Tony Kay
      • Dave Bladen
      • Steven D Mills
      • Sue Crossland
      • Luke Dalby
      • McMaster University
      • Hangloose
      • Paul Waterhouse
      • Raf Sauvillers
    • User Videos
    • User Equipment
    • Organisations
  • Help
    • Video Settings
    • Webcams
    • Other Equipment
    • Blog
    • How To
    • Training Videos
    • FAQ
    • User Manual
    • Release Notes
    • Terms of use
    • Contact
  • About

Creating and Saving Photo Print Layouts in RightBooth

18/2/2016

2 Comments

 
Updated: November 2021

​RightBooth provides powerful and flexible photo print layout capabilities that allow you to create totally unique and professional print layouts for your photos.

The print layout used in this article comprises a column of 4 photos that are duplicated in a second column alongside.

During the event, each user's set of 4 photos will be placed in this printer layout.  You can choose to print them during the event, or have them saved for printing after the event.

This Blog article explains how to go about designing this photo print layout.
Picture
1 - Set your Event for Photo Capture

You must first set your event to take 4 photos.
  • From the RightBooth main screen, click the Design button to take you to the Event Designer.
  • In the Event type section, tick the 'Photos' recording type
  • Type 4 into the photo count text box
Picture
2 - Enable Printing in your Event

In order to gain access to the Print layout screen, you must first enable photo printing in your event. To do this, again go to the Event Designer, then:
​
  • Click the Event Structure tab,
  • Choose the section 'Print photos'
  • Set the Print photos option to Yes or Ask the user.
Picture
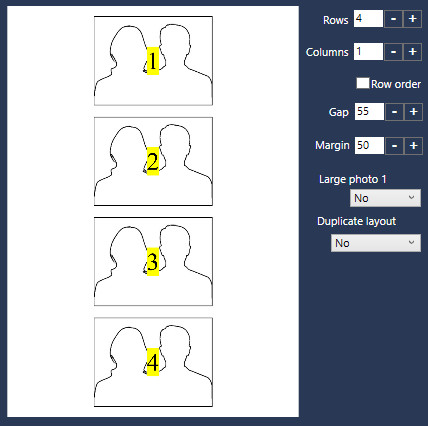
3 - Designing The Print Layout Screen

Now that you have enabled your event for photo printing, you will be able to design the Print Layout screen.
From the RightBooth main screen, click the Edit button to take you to the Screen Editor.

In the Screen Editor you will see that the Print layout screen is listed on the Screen Editor Toolbox.
Click on the Print Layout. This will then show you the initial print layout with 4 photo place holder images positioned on a blank page.  Each placeholder is numbered to show you where each of the 4 photos will be placed.
Note: If all the placeholders are not showing on the page, use the Photo Layout Arranger (see section 4 below).

Your layout will be initially set to be the size of your chosen printer paper.  

If needed you can alter the paper size by clicking on the Properties check box on the Screen Editor toolbox to show the Print layout properties toolbox.   You can change the design size size from the drop down selector or by entering the paper dimensions in the W and H text boxes to match your actual printer paper size (in inches).

You can also rotate the paper layout to allow you to design for either Portrait or Landscape printing by ticking the 'Swap' checkbox on the Print layout properties toolbox.

You can now move, size and rotate the photo place holders on the layout to suit your design.
​Alternatively you can use the Photo Layout Arranger (see next section).
4 - Using the Photo Layout Arranger

Notice that when viewing the Print layout screen, an Arrange button appears at the top of the Screen  Editor Toolbox. Click this button to take you to the Photo Layout Arranger.

The Photo Layout Arranger allows you to quickly arrange your place holder images on the page in various ways.

To create our example layout, first set the values as shown in the screen shot opposite.

We've specified one column with four rows to accommodate our four photos.  Notice the photos are positioned centrally on the page.
Picture
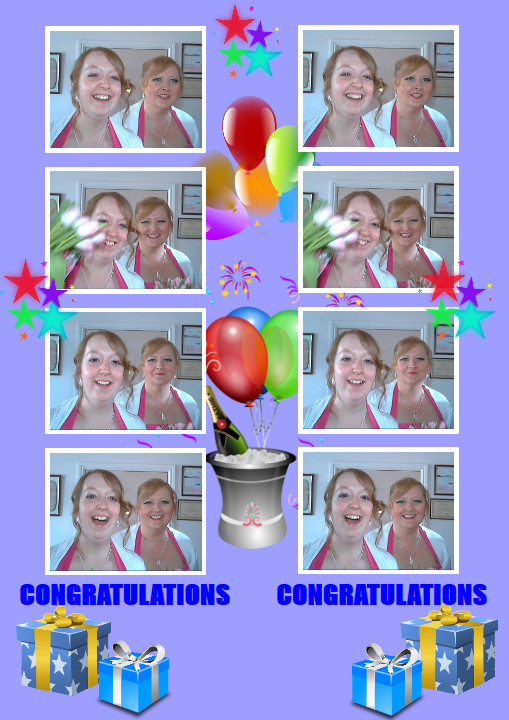
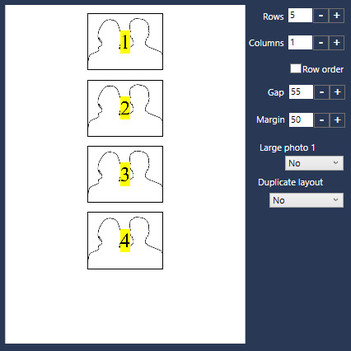
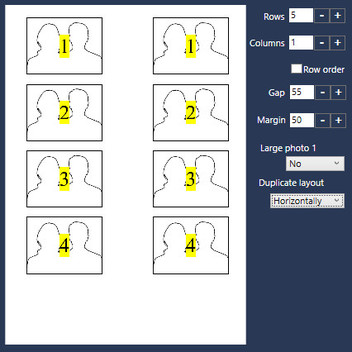
​We have then added a Gap of 55 pixels between each place holder to space them apart.
We've also added a Margin of 50 pixels to keep all photos in from the edges of the page.
​​Next, increase the Rows to 5.

Notice that because we only have 4 photos in our event, we do not see a fifth photo place holder in the column, this position remains blank. 

We are doing this so that we create some space at the bottom of the layout to allow us to add some text objects (see later)
Picture

​Now change the Duplicate layout property to Horizontally

This will duplicate the layout and place it alongside the original in the horizontal direction.

This now effectively creates two layouts, with each photo placeholder appearing twice on the page, and each layout having one column with five rows and the same Gap and Margin values.

Click the OK button to accept this Photo Layout and it will be automatically applied to the Print Layout screen.
Picture
5 - Decorating the Print Layout

Once you have arranged the photo place holders, you can then perform some screen designing and add various images and text items to make the print layout more interesting.

To do this, tick the Add items checkbox on the Screen Designer Toolbox. This will show the Add items toolbox from which you can choose to add new images and new labels to the layout.

In the screen shot you can see we have added some images and text items and we are editing one of the text items with the word 'CONGRATULATIONS'.
Picture
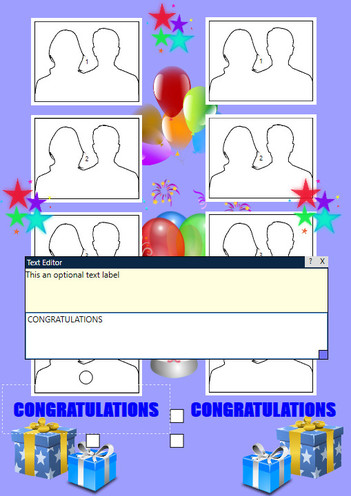
Notice that we've placed some of the image items behind the photo place holders (the balloons) and others in front of the photos (the stars).  You can do this using the layering buttons on the Item Properties toolbox.
​
When you are happy with your print layout, make sure you return to the RightBooth main screen and save your event file.  Your print layout will also be saved in your event file.

Now when you run the event, after each user takes their four photos, the photos will be automatically placed in the print layout and then printed.
6 - Saving your Layout Design
You can save your print layout designs separately from the event file by clicking the Save button at the top of the Screen Toolbox.  In this example screenshot I am saving a layout with the name MyNewLayout.txt:
Picture
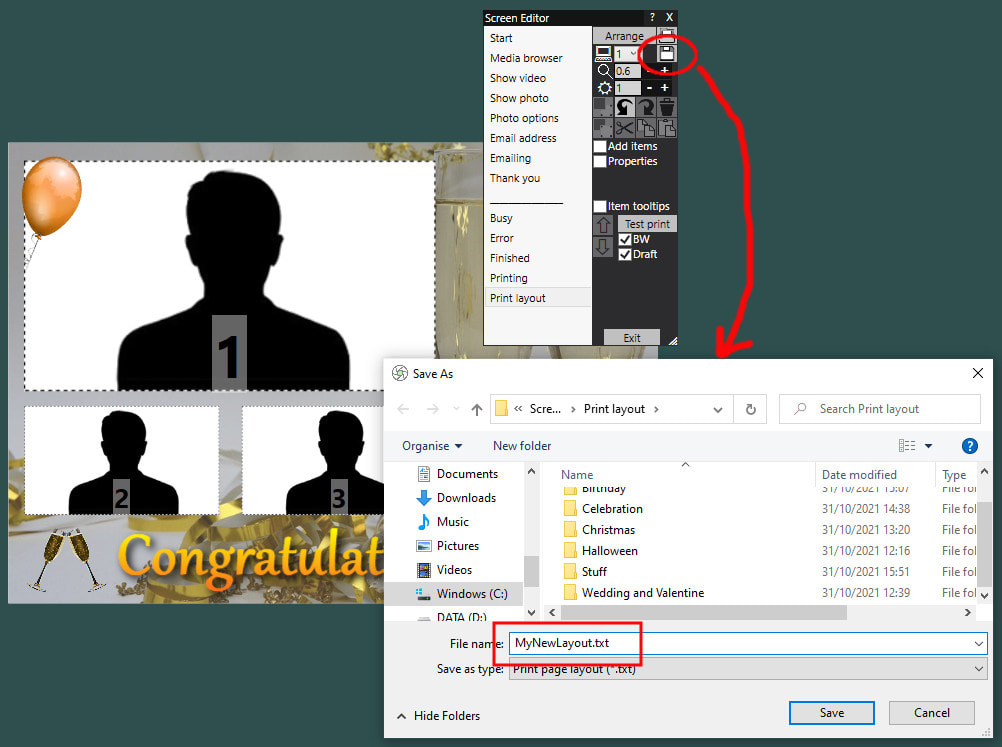
​You can then pick and choose from your saved layouts later by clicking the Open button at the top of the Screen Toolbox to browse the Media Library for a layout.

​
In this article we have described how to achieve just one layout.  Try experimenting with the Photo Layout Arranger Tool to see what other arrangements you can achieve with your photos. 

And don't forget, if the Arranger tool doesn't give you what you need, just manually move, size and rotate the photo placeholders on the screen to achieve your desired layout.


We hope you can see that the Print Layout Designer provides a powerful set of features that let you create the perfect print layout for your photo events.
2 Comments
Werner link
12/9/2016 07:16:35 pm

Two questions:

Can one do a portrait photo
can one print one large photo (4x6")

I am using a Canon SelphY

Many thanks

Reply
Nigel
12/9/2016 10:11:53 pm

You need to set the photo cropping option as described in this Blog post:
http://www.rightbooth.com/blog/using-cropping-to-create-square-videos-and-square-photos

If you set the webcam capture size to 1920x1080 then in order to capture 4x6 aspect ratio photos you can set the crop width and height to 720x1080. This will give you 4x6 aspect ratio photos.

You also need to set your selphy printer default paper size to 4x6. Then you will be able to design your RightBooth print layout so that your photo completely fills the printed paper.

Reply


Leave a Reply.

    Author

    Nigel Pearce

    View my profile on LinkedIn

    RSS Feed

    Archives

    May 2022
    April 2022
    March 2022
    February 2022
    January 2022
    December 2021
    November 2021
    October 2021
    September 2021
    August 2021
    July 2021
    June 2021
    May 2021
    April 2021
    March 2021
    February 2021
    January 2021
    December 2020
    November 2020
    October 2020
    September 2020
    July 2020
    June 2020
    May 2020
    April 2020
    March 2020
    February 2020
    January 2020
    December 2019
    November 2019
    October 2019
    September 2019
    August 2019
    July 2019
    June 2019
    May 2019
    April 2019
    March 2019
    February 2019
    January 2019
    November 2018
    October 2018
    September 2018
    August 2018
    July 2018
    June 2018
    May 2018
    April 2018
    March 2018
    February 2018
    January 2018
    December 2017
    November 2017
    October 2017
    September 2017
    August 2017
    July 2017
    June 2017
    May 2017
    April 2017
    March 2017
    February 2017
    December 2016
    November 2016
    October 2016
    September 2016
    August 2016
    July 2016
    June 2016
    May 2016
    April 2016
    March 2016
    February 2016
    January 2016
    December 2015
    November 2015
    October 2015
    September 2015
    August 2015
    July 2015
    June 2015
    May 2015
    April 2015
    March 2015
    February 2015
    January 2015
    November 2014
    October 2014
    September 2014
    August 2014
    July 2014
    June 2014
    May 2014
    April 2014
    March 2014
    February 2014
    January 2014
    December 2013
    November 2013
    October 2013

RightBooth logo
RIGHTBOOTH
​© 2013 - 2022 Aire Valley Software
News
​
Tutorials
​
FAQ
About
​
Contact
​
Terms of use and ​Privacy Policy
  • Home
  • Products
  • Try
  • Feedback
    • Comments
    • User stories >
      • Mike Ridge
      • Tony Kay
      • Dave Bladen
      • Steven D Mills
      • Sue Crossland
      • Luke Dalby
      • McMaster University
      • Hangloose
      • Paul Waterhouse
      • Raf Sauvillers
    • User Videos
    • User Equipment
    • Organisations
  • Help
    • Video Settings
    • Webcams
    • Other Equipment
    • Blog
    • How To
    • Training Videos
    • FAQ
    • User Manual
    • Release Notes
    • Terms of use
    • Contact
  • About