RIGHTBOOTH
  • Home
  • Products
  • Try
  • Help
    • Video Settings
    • Webcams
    • Other Equipment
    • Blog
    • How To
    • Training Videos
    • FAQ
    • User Manual
    • Release Notes
    • Terms of use
    • Contact
  • Feedback
    • Comments
    • User stories >
      • Mike Ridge
      • Tony Kay
      • Dave Bladen
      • Steven D Mills
      • Sue Crossland
      • Luke Dalby
      • McMaster University
      • Hangloose
      • Paul Waterhouse
      • Raf Sauvillers
    • User Videos
    • User Equipment
    • Organisations
  • About

Create A Scrolling Credits Screen

9/5/2017

0 Comments

 
Updated: Jan 2021
​Would you like to show a scrolling credits screen at the end of your event, similar to those seen at the end of a great movie?

This article explains how you can design a professional looking scrolling credits screen that will be displayed to each of your event users, something like this...

Step 1 - Write your credits

  • Write your credits using Windows Notepad.
  • In the Windows Start box, type notepad
  • Select and run Notepad
  • Type your credits and make sure you add quite a few empty lines between each credit.
  • Save your file somewhere on your computer (such as your Documents folder)
  • Name the file: credits.txt
Take a look at the credits file we created for this tutorial...
credits.txt
File Size: 0 kb
File Type: txt
Download File

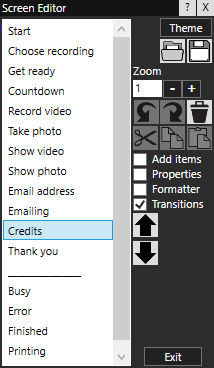
Step 2 - Add a credits screen to your RightBooth event

  • Run RightBooth
  • Open your event file
  • Go to the Screen Editor
  • On the Screen Editor toolbox, click the Add items checkbox to show the Add Items panel 
  • On the Add items panel, click the Screen button to add a new blank screen to your event.
  • Name your new screen: Credits.
  • Use the Down arrow on the Screen Editor toolbox to move the new Credits screen down the screen list so that it is placed just above the Thank you screen (see image)
Picture

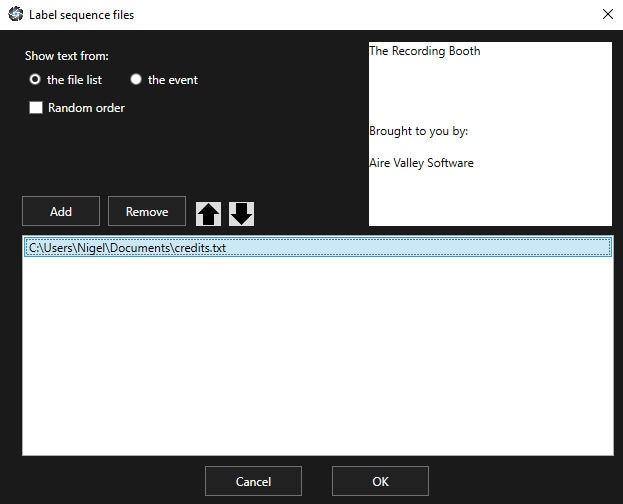
Step 3 - Add content to your Credits screen

  • In the Screen editor, select the new Credits screen.
  • On the Screen Editor toolbox, click the Properties check box to show the Screen Properties panel.
  • Click the Video button (in the Background section of Properties)
  • Choose a video from the RightBooth Media Library.  For this tutorial we chose the file Space3 (located in the \Space folder)

​Note: The Videos in the Media Library have all been optimised for speed and designed to loop seemlessly,
  • On the Add Items panel, click the Label Sequence button to add a new blank label sequence item to your credits screen.
  • Double click the mouse on the new blank label sequence item to show the Label sequence files panel.
  • In the Label sequence files panel, click the Add button
  • Browse and select your credits.txt file to add this file to the sequence list (see image)
  • Click OK to return to the credits screen.
Picture

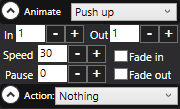
Step 4 - Set the credit animation properties

Your label sequence item will now be showing your credits.  You need to edit its animation properties:
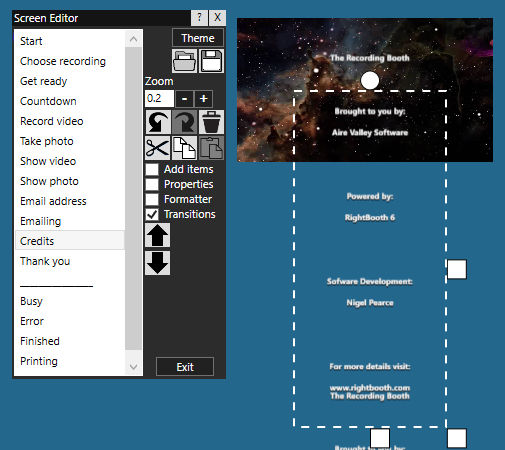
  • Click on the label sequence item to select it
  • Tick the Properties check box on the main toolbox to show the Properties toolbox
  • Set the following animation properties:
Picture
  • Animate: Push up
  • In: 1
  • Out: 1
  • Speed: 30
  • Pause: 0
  • Fade in: Not ticked
  • Fade out: Not ticked
  • Also (VERY IMPORTANT), make sure you un-tick the Clip property.

Step 5 - Size and position the credits

This step is a little tricky to get right, but keep going until you achieve the desired affect.
  • Alter the width of the label sequence item to suit your credit text contents.
  • Alter the height of the label sequence item so that it is slightly bigger than the full extent of the credit text contents.
  • Note that you will need to zoom out the editor view to achieve this.  In the screen shot you can see that we have zoomed out the editor view to 0.2 to allow us to move and size the item beyond the extents of the credit screen boundary
  • Position the label sequence item so that most (if not all) of it extends below the bottom edge of event screen as shown in the screen shot.
Picture
​You will need to experiment with both the vertical position and the height of the label sequence item until you get the desired effect shown in our example video.

Remember that the label sequence item's Clip property must be turned off.  This will allow the push animation to keep displaying the text contents up past the top edge of the label sequence item.

Note that the credits will keep on scrolling until your credits screen times out.

Job Done.   ​Watch out Speilberg (or is it Lucas?), we're coming to take over :-)
0 Comments


Leave a Reply.

    Author

    Nigel Pearce

    View my profile on LinkedIn

    RSS Feed

    Archives

    March 2023
    February 2023
    January 2023
    December 2022
    November 2022
    October 2022
    September 2022
    August 2022
    July 2022
    June 2022
    May 2022
    April 2022
    March 2022
    February 2022
    January 2022
    December 2021
    November 2021
    October 2021
    September 2021
    August 2021
    July 2021
    June 2021
    May 2021
    April 2021
    March 2021
    February 2021
    January 2021
    December 2020
    November 2020
    October 2020
    September 2020
    July 2020
    June 2020
    May 2020
    April 2020
    March 2020
    February 2020
    January 2020
    December 2019
    November 2019
    October 2019
    September 2019
    August 2019
    July 2019
    June 2019
    May 2019
    April 2019
    March 2019
    February 2019
    January 2019
    November 2018
    October 2018
    September 2018
    August 2018
    July 2018
    June 2018
    May 2018
    April 2018
    March 2018
    February 2018
    January 2018
    December 2017
    November 2017
    October 2017
    September 2017
    August 2017
    July 2017
    June 2017
    May 2017
    April 2017
    March 2017
    February 2017
    December 2016
    November 2016
    October 2016
    September 2016
    August 2016
    July 2016
    June 2016
    May 2016
    April 2016
    March 2016
    February 2016
    January 2016
    December 2015
    November 2015
    October 2015
    September 2015
    August 2015
    July 2015
    June 2015
    May 2015
    April 2015
    March 2015
    February 2015
    January 2015
    November 2014
    October 2014
    September 2014
    August 2014
    July 2014
    June 2014
    May 2014
    April 2014
    March 2014
    February 2014
    January 2014
    December 2013
    November 2013
    October 2013

RightBooth logo
RIGHTBOOTH
​© 2013 - 2023 Aire Valley Software
News
​
Tutorials
​
FAQ
About
​
Contact
​
Terms of use and ​Privacy Policy
  • Home
  • Products
  • Try
  • Help
    • Video Settings
    • Webcams
    • Other Equipment
    • Blog
    • How To
    • Training Videos
    • FAQ
    • User Manual
    • Release Notes
    • Terms of use
    • Contact
  • Feedback
    • Comments
    • User stories >
      • Mike Ridge
      • Tony Kay
      • Dave Bladen
      • Steven D Mills
      • Sue Crossland
      • Luke Dalby
      • McMaster University
      • Hangloose
      • Paul Waterhouse
      • Raf Sauvillers
    • User Videos
    • User Equipment
    • Organisations
  • About