
|
Updated: Jan 2021 During an event whenever a user takes a set of photos, they are normally displayed on the 'Show Photo' screen using a standard white, round cornered border, as shown in this screenshot designed for 3 photos: 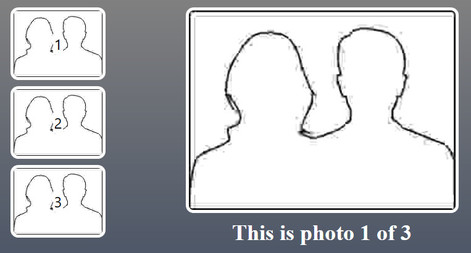 This article explains how you can easily alter this style so that your photos appear within a filmstrip.
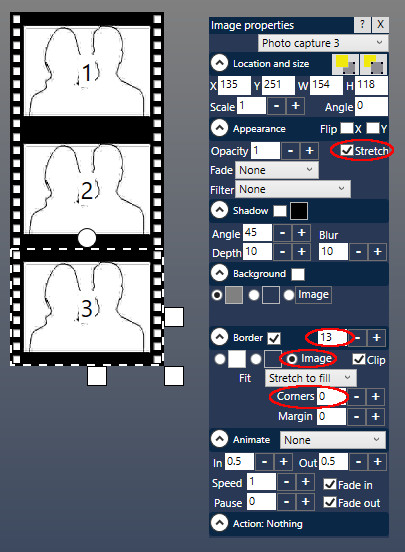
You can then re-position all the placeholder images on the screen so that they form a continuous filmstrip as shown in the screen shot opposite.
Note: If the Filmstrip image does not appear when browsing for it, you may need to download and install the RightBooth Media Library
0 Comments
Updated: Jan 2021 During your events, there may be occasions where you want to show your users a screen containing information or perhaps play a video or show some images. This article explains how to add your own customised screens to your events. Adding a new screen
You can now start to add items to the new screen. You can add any item (or combination of items) from the Add Items Toolbox. You could display text, videos, images, countdowns, clocks, etc. Choosing a Screen Display TimeoutYou need to decide how long your new screen will be displayed to your event users. Open the Properties Toolbox and set the Screen Timeout to one of the following:
Decide When To Show Your ScreenOn the Screen Editor Toolbox, make sure your new screen is selected, then use the Up and Down arrow keys to move your screen up or down the Screen List to the position you would like the screen to appear. For example, if you would like your new screen to appear immediately after the Choices screen during the event, move the screen down until it is shown below the Choices screen on the Screen List. Points to Note
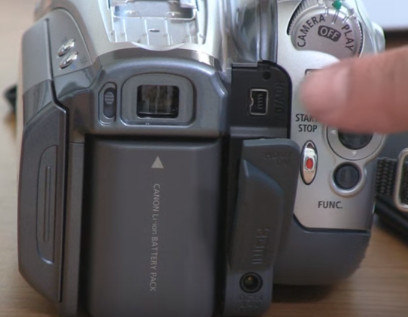
Your computer must have a Firewire input port If it doesn't you can obtain a FireWire PCI card at very low cost (less than $12) from stores such as Amazon. You will also need a Firewire cable (less than $5) to attach the camcorder to the FireWire port on your computer, or perhaps your camcorder already has a Firewire cable, in which case Happy Days! Next you need to download and install the software tool: DVDriver Search for 'DVDriver' This piece of software lets you use your camcorder with any software that works with webcams (including RightBooth). It works by fooling Windows into thinking that your camcorder is just an ordinary USB webcam. We've not tested this software, but we know of people using it successfully on their computers. And that's really all there is to it Once all the above conditions are met, the DVDriver should appear for selection in the Webcam list within the RightBooth Video settings. Select DVDriver from the Webcam list and you are good to go. Whilst we have not tried this configuration ourselves we know of RightBooth users who have connected a camcorder this way, and they report that it produces really great video recordings.
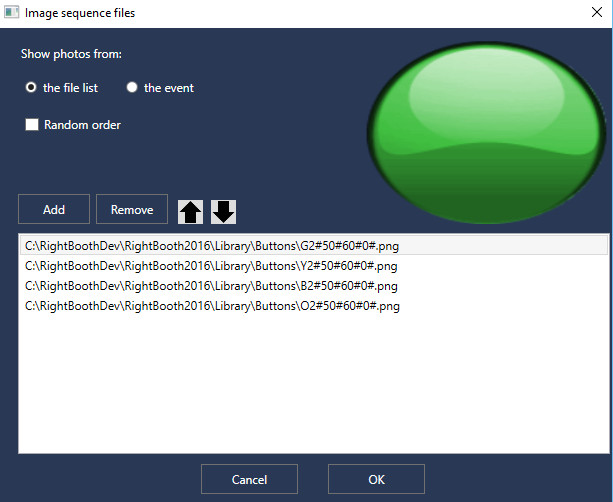
Now show the Image Sequence Properties and set the Animate properties to those shown in the screen shot below: 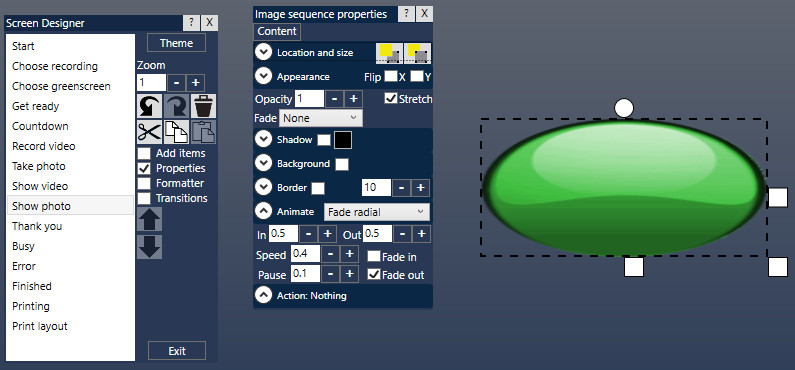 There are lots of animation types to choose from, so try experimenting with various animations and speeds until you achieve the desired effect. In our example we are applying a radial fade effect between the images. The effect speed is 0.4 seconds with a 0.1 second pause between each animation. We now need to add the text prompts.
Now show the Label Sequence Properties and set the Shadow, Text and Animate properties to those shown in the screen shot below: 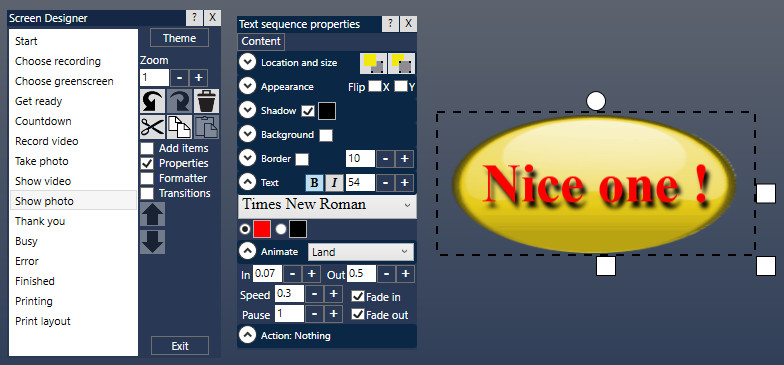 Again, you can play with the Animate properties until you obtain the desired animation effect between the text prompts.
|
AuthorNigel Pearce 
Archives
July 2024
|
 RSS Feed

|
|