
|
Before we cover this, we'll first explain how to change the background image on any screen in your event,
How to use one of your own images?
Repeat the steps above, but instead of choosing an image from the Library, click the More images... button (at th bottom left corner of the Media Library window). You can now browse your computer to find an image that is not part of the Media Library. You should try and ensure that any image you use is not an overly large file and ideally it should be the same pixel size as your computer display ( for example 1920 x 1080 pixels ). More information can be found in this article.
0 Comments
Updated: Jan 2021 So you've set up your event for photo printing and it's going to be a busy night. Lots of people will be using your system, taking sets of photos and getting fantastic print outs. But how do you ensure that everything is going to run perfectly all evening? Can the system cope? Here is what you need to consider to make sure everything runs smoothly. 1 Use a fast, reliable, quality printer In some ways, this really goes without saying. If you are thinking of using a cheap, slow A4 printer please DONT! If each print out is taking longer than a minute to print then you are inevitably going to find a backlog of people queuing up waiting for their photos to print out and in extreme circumstances you may well overload the computer with print jobs, causing the system to slow down or (in the worst case) lock up and crash. There are many great printers on the market that are designed to print hundreds of top quality photos, time after time in 30 seconds or less. So read the printer specs and make sure you get yourself decent one !! 2 Reduce the Printer Workload It is possible to reduce the chance of seeing the 'people printer queue' by reducing the amount of printing that is required for each user. Try the following things to help speed up the printing process: Reduce the printer quality You might find that printing at a lower quality gives you satisfactory results. It will certainly reduce the printing time.
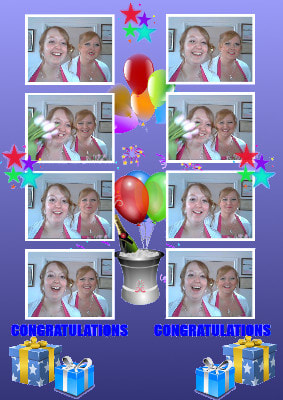
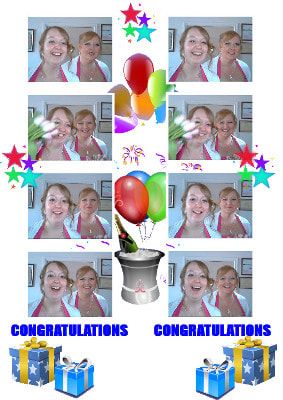
Increase the amount of white space on your Printer Layout Design Did you know that white areas on a printout do not require any printing? If you don't believe me try sending a blank page to your printer and see how fast it prints out !! Take a look at these two print layouts. The one with the blue shaded background will take much longer to print than the one with the white background. It will also use up a lot more ink...
So think about making use of the colour white within your RightBooth print layouts 3 Create Smaller Prints Again I guess this goes without saying but usually the smaller you make your print layout, the faster it will print out. And printing to smaller sized paper will also reduce time. So rather than printing on A4 paper, find a printer that can take smaller paper sizes such 6" x 4". 4 Prevent Printer Jobs Building Up on the Computer Maybe you just have no choice but to use your trusty old slow printer! So in this situation you can't prevent the 'people printer queue' but you can prevent the chance of overloading your computer with a build up of print jobs. Here's how...
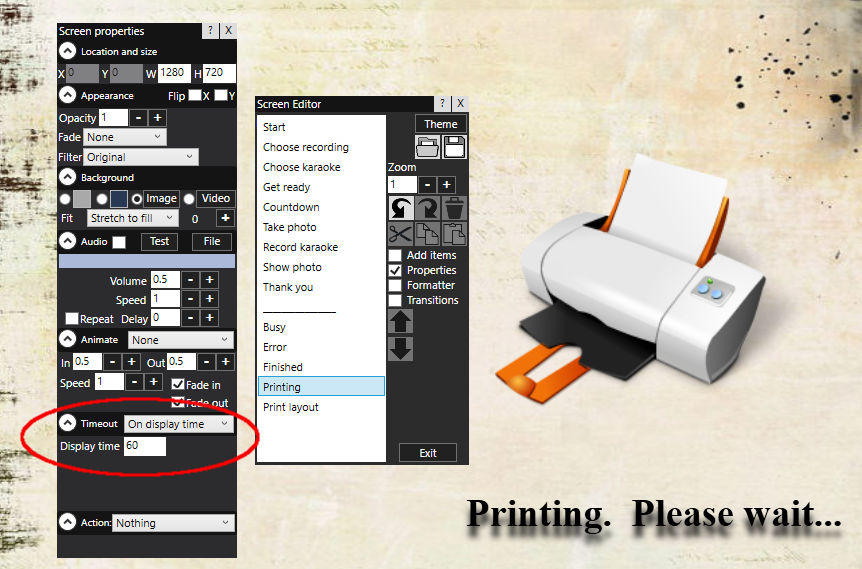 Now the Printing screen will be shown during the event for as long as it takes to create each print out, and this will effectively stop others using the system during any printing. This solution will stop the build up of printer jobs, but it will also slow down the throughput of your users. So use this idea carefully. You may find that you can set this Display time to say 30 seconds, ie. half the printing time. In this situation you probably need to find a balance between people throughput and print job throughput. 5 Use Multiple Printers
OK. You've tried all the suggestions above but you just want more people using your system and getting their printouts quicker !! Well if money is no object, why not make use of more than one printer? Yes, RightBooth allows you to attach and use up to 4 printers at the same time. Read this article for more information. 6 Final Option - Printing After the Event Has Finished Rather than printing during the event you can save all the user's print layouts as files that can then be printed at a later time or date. To do this:
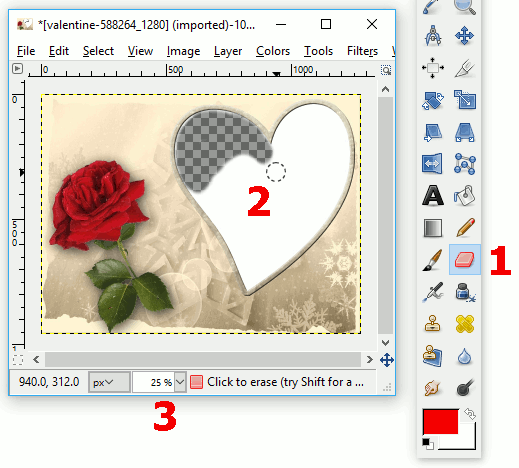
Now, at any time you can click the Tasks button on the RightBooth Main window to visit the Task panel. Here, click on the Print photos tab to see a full list of all the print layouts that have been created by your event users. Then you can select one or more for printing. Happy printing ! Updated: Jan 2021 You may have already seen the overlay images that are provided with RightBooth. If you have installed the RightBooth Media Library then you will find them in this folder on your computer: C:\Users\Public\Documents\RightBooth7 Library\Images\Overlays All the images in the Overlays folder contain various transparent areas that allow your recorded videos and photos to show through, for example: 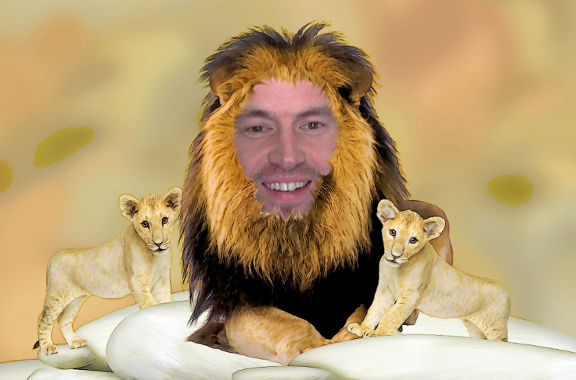 You can add your own images into the Overlays folder and then use them in RightBooth. This article explains how. 1 - Get Yourself An Image Editing Program This article demonstrates how to create overlay images using GIMP, a free image editing package. If you are unfamiliar with GIMP or image editing, please first read this article 2 – Find An Image There are plenty of places on the Web to find images, including sites like pixabay.com which are all completely free to use. For this tutorial we are using this image (which you’ve probably already seen included in the Overlays folder:  Image source: https://pixabay.com/en/valentine-greeting-card-frame-588264/ This image is ideally suited to be edited and altered into an overlay image, allowing the RightBooth event user’s head(s) to appear in the heart shaped photo frame. Download the image and save it onto your computer. Notice that it is a JPG image. 3 – Edit The Image JPG images do not contain any transparent areas so we need to edit the image in GIMP to make the white heart area transparent.
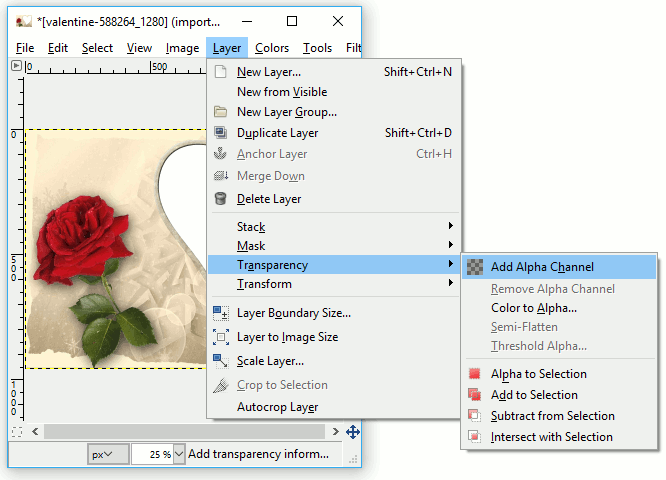
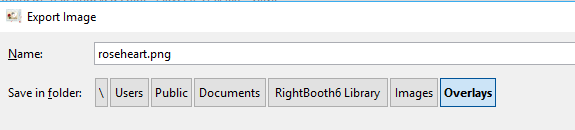
4 Save the Image We need to save the image as a PNG file because PNG images can retain the transparent areas.
 Job done.
You now have a new overlay image for use in RightBooth. Now it’s your turn to find some suitable images that you can modify and use as overlays. And don’t forget to seek permission from the image owner if they are not free to use. |
AuthorNigel Pearce 
Archives
July 2024
|
 RSS Feed

|
|