
|
Updated: Feb 2021 RightBooth can allow other applications to modify your photos as part of the RightBooth event flow. This article explains how to apply Photoshop filters to your RightBooth photos. Step 1 - Get Photoshop Perhaps it goes without saying but the process described in this article will only work if you actually have a copy of Photoshop installed on the same PC as RightBooth. At the time of writing, Photoshop is no longer available as a single purchase product, so you must take out a monthly subscription. This can start out from as little as £8 per month on a rolling contract. Visit www.adobe.com for all the details. Step 2 - Create some Photoshop Droplets What are Photoshop Droplets? A droplet is an executable file generated by Photoshop that allows you to apply a set of actions to an image just by providing the droplet with the filename of a photo. When the droplet runs, it will open Photoshop, load the RightBooth photo, then apply all the actions to the photo and re-save the modified photo with the same filename, overwriting the original. Using this approach, you can create droplets that can modify photos in many different ways using any of the incredible photo manipulation features available in Photoshop. This article will not be explaining how to create Photoshop droplets, there is a huge amount of information on how to do this on the Internet. Here is a typical article: https://pixel77.com/how-create-droplet/
Step 3 - Use the Droplet in RightBooth To do this:
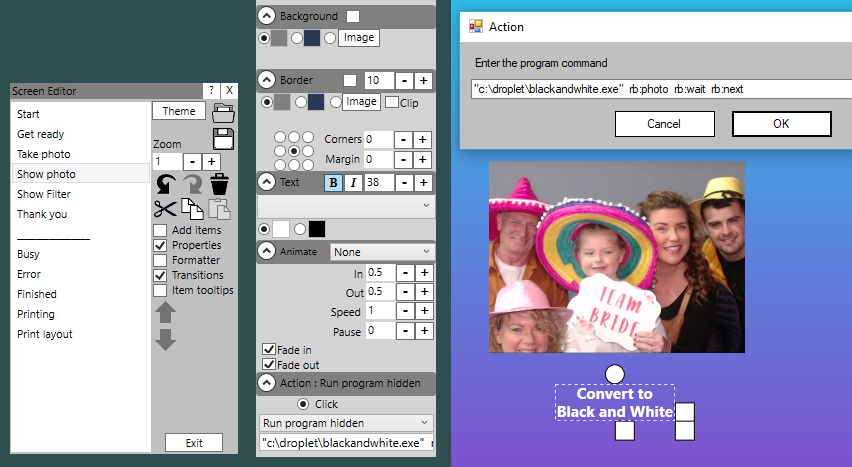 Now when the event is played and a photo is taken, if the user clicks (or touches) the label item, RightBooth will:
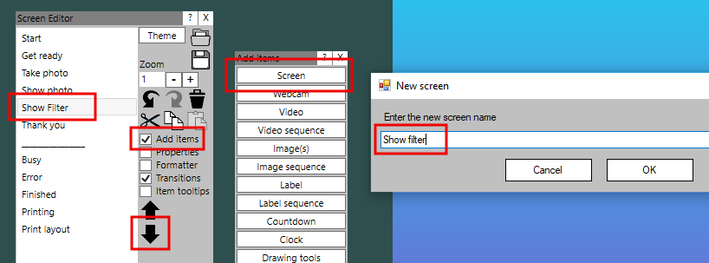
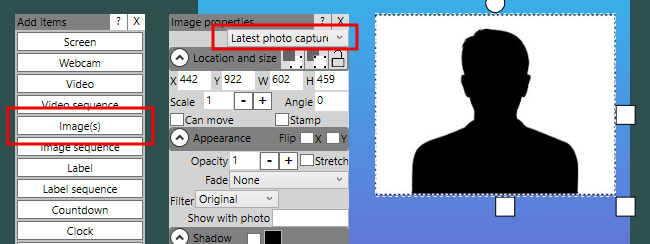
Step 4 - Show the modified photo in RightBooth In order to show the user the resulting modified photo:
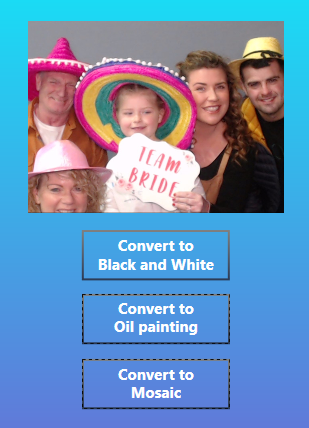
 Now when the event is played if the user clicks (or touches) the 'Convert to Black and white' label item on the 'Show photo' screen, RightBooth will then show the modified black and white image on the 'Show Filter' screen.
Allow Users to Change their Filter Choice If you would like users to try a different filter after having chosen one:
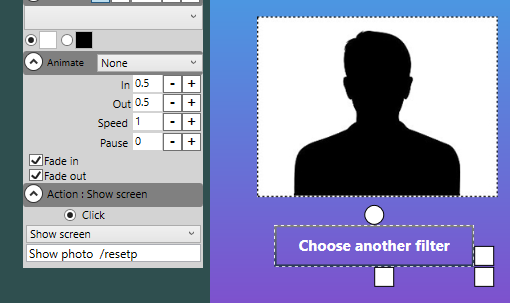 Now when the event is played if the user clicks (or touches) the 'Choose another filter' label item on the 'Show Filter' screen, RightBooth will return to the 'Show photo' screen and will show the user the original, unmodified photo again ( due to the /resetp parameter ), allowing the user to select another filter. Prevent Photoshop appearing
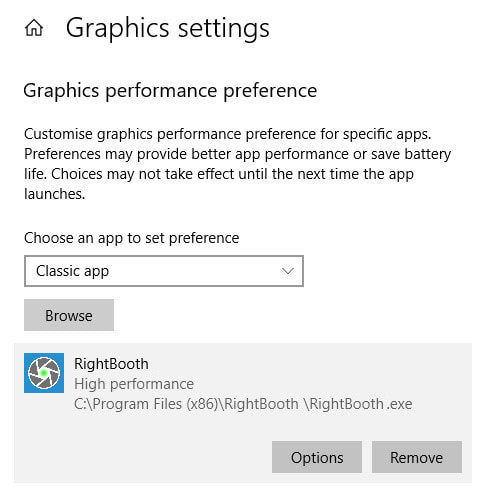
When a Photoshop droplet runs it will automatically open Photoshop and apply all the actions to the photo. This may cause Photoshop to appear in front of your event when the user selects one of the filters. To prevent Photoshop appearing you can set the RightBooth event to remain on top of all other applications as follows:
0 Comments
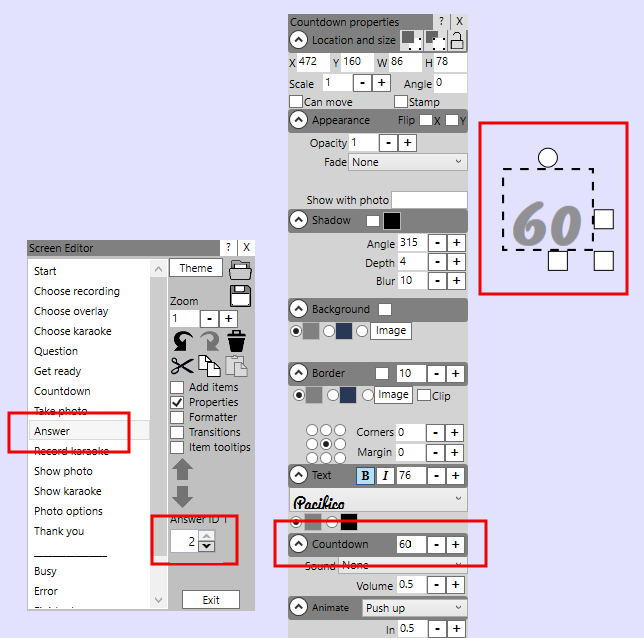
Updated: Jan 2021 If your RightBooth event contains questions that require video answers then the recording time for each answer is initially set to the value you have entered in the Maximum recording time text box. Here you can see we have set the event to be a Question event and the default recording time has been set to 40 seconds: 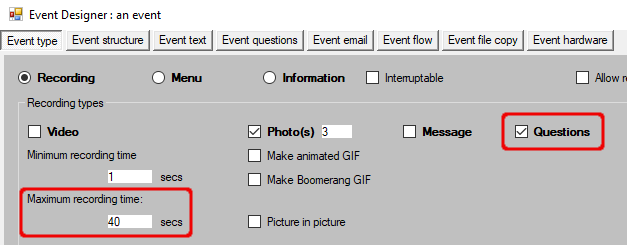 In this example, every time you add a new question to the Questions table (in the Event questions section) the question will be given an initial video recording time of 40 seconds. However, once a question has been added to the event, subsequent changes to the Maximum recording time value will not alter the recording time for any of the existing video answers in the event. This is because each defined video answer maintains its own independent recording time once it has been created. So what if you want to alter the recording time for one (or more) of the video answers in your event? Here's how:
 RightBooth is a graphics intensive application, especially if you are using multiple video files and graphics animations in your event designs. For this reason you may find that it performs better if you add RightBooth to the Windows 10 graphics performance list and set it to 'High performance'. To do this:
 Over the years I have tried many apps and online utilities for downloading videos from the Internet, especially YouTube. These utilities tend to come and go, and some of them can install all kinds of unwanted files, services and viruses on your PC. This article describes what I consider to be one of the safest methods for downloading videos from the Internet. Step 1 - Get VLC Media Player This excellent and well trusted freeware app can be downloaded here: https://www.videolan.org/index.html Step 2 - Obtain the URL of the video you want to download For example in YouTube find a video and start it playing. Then right click on the playing video and choose: 'Copy video URL' from the popup menu. Step 3 - Paste the Video URL into VLC and Start it Playing
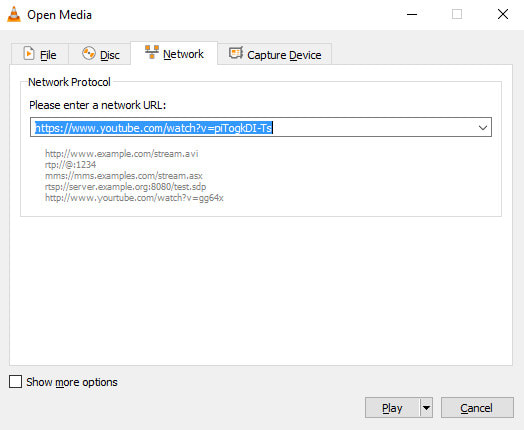 Step 4 - Get the Video Location URL Once the video starts playing in VLC media player, on the main menu select: Tools --> Codec Information and then copy the Location URL: 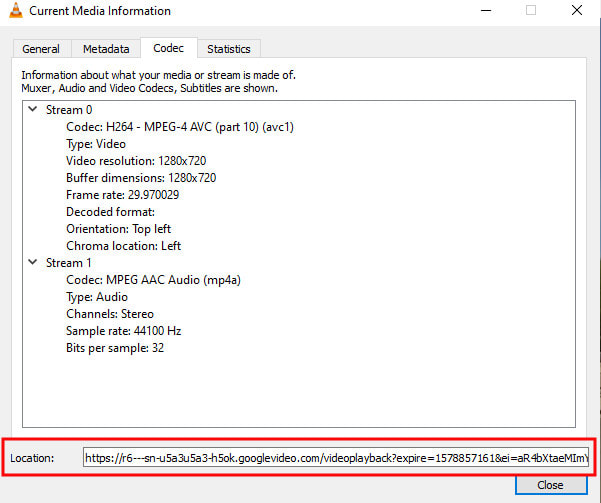 Step 5 - Enter the Location URL into your Browser Address Bar
Navigate to the video location by pasting the copied location url into the address bar of your browser. When the video is playing in your browser, right click on the playing video and choose 'Save As' from the popup menu to download the video to a chosen folder on your PC. Job done, and without any risk of installing unwanted garbage on your PC :-) |
AuthorNigel Pearce 
Archives
July 2024
|
||||||
 RSS Feed

|
|