
|
This video tutorial shows how to use RightBooth to design and present an interactive map or plan that will allow users to locate items on the plan. Typical uses include locating:
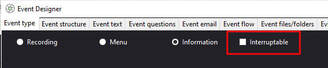
IMPORTANT Update: 27/10/20 I forgot to mention this important point in the video. Please ensure that you untick the following option: RightBooth Event Designer --> Event type --> Interruptible...  If this option is not ticked then the user can interact with any items on the information event screens that have click actions assigned to them. This will allow the seating plan interactivity to work as shown in the video.
If this option is ticked, then any user input into the event on any screen will cause RightBooth to interrupt the information event and start playing the event that is specified in the Event flow section of the Event Designer.
2 Comments
New update released: version 7.5.14. This includes a new set of image assets that will help you when designing your interactive seating plan event screens for wedding receptions and other events: 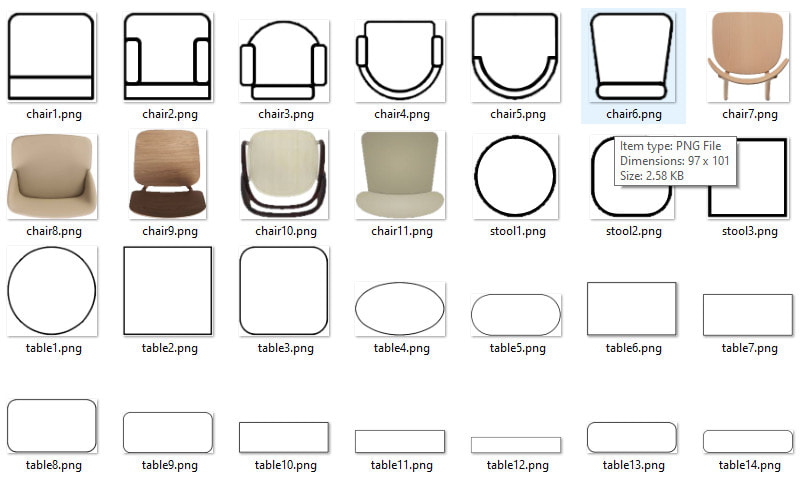 Note: You will need to download and install the full product from here to find these assets in the new library folder: Tables and chairs within the RightBooth Media Image Library. This release also adds the new feature: Add more screens which allows you to quickly and easily replicate a user defined screen multiple times in the Screen Designer. A training video will be posted soon that shows how to make use of these new assets and features when designing interactive seating plans within your RightBooth events. Update 26/10/20 If you are running RightBooth in a language other than English and you want these new image to appear in your RightBooth Media Library then you need to do the following:
C:\Users\Public\Documents\RightBooth7 Libreria\licensing.txt
If you would prefer to get the tables and chairs manually...
You may want to create many copies of a particular label item, such that each label contains a different word or phrase but is identical to the original label in all other respects, such as font style, colours, shadowing, etc. Starting with RightBooth version 7.5.13 you can now create copies of a label item, by right clicking on the label item and then from the popup menu choose: Create more labels – Click this menu option to show a dialog box into which you can type one or more lines of text. Then click the OK button to automatically create individual label items for each of the lines of text. Here is a example video of this enhancement in action: Starting with RightBooth version 7.5.12 you can now capture images of your event screens, saving them either as JPG files or PNG files. When the screen image is saved, all items on the event screen will also be captured and saved inclusively within the image. This feature is therefore useful in letting you use the Screen Editor much like a graphic design tool (such as the GIMP) for creating your own image designs composed from multiple items on the screen. To capture an event screen, first show the chosen screen in the Screen Editor, then right click anywhere on the screen background (i.e. avoid clicking on any of the items on the screen). You will then see a popup menu containing the following choice: Capture screen – You can click this menu item to show a File Save dialog box, prompting you to save the event screen as an image in the Backgrounds section of your RightBooth Media Library. Note that in the dialog you can choose to save the image either as a JPG or a PNG file. This screenshot shows an example of saving a Menu screen as a JPG file in the RightBooth Backgrounds folder... 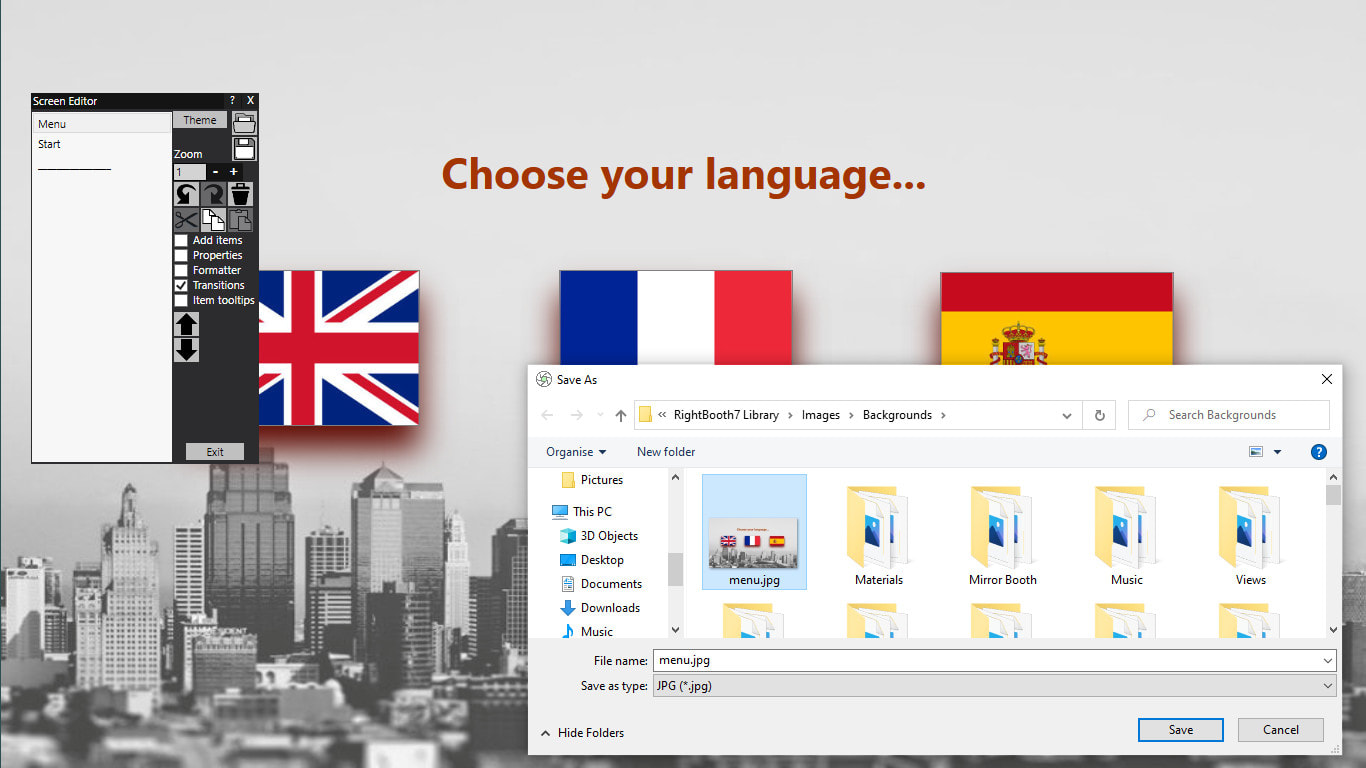 Updated 02/06/21 Starting from RightBooth version 7.5.10 you can now configure RightBooth so that it accepts spoken commands for controlling the playing event. How To To turn on voice commands, go to RightBooth User input settings and tick the option: Voice. Then in addition to your chosen user input method (e.g. Mouse or Touchscreen), voice commands will also be enabled for all your events. You will need to ensure your event is designed for voice commands as follows: In the Screen editor, on each event screen where you would like voice command control, add one or more label items. Type the word or phrase into the label item(s) that you would like to be used as a voice command. Then add an appropriate click action on the label item. For example, if you would like RightBooth to progress from the Start screen to the next screen in the event by saying ‘Start now’:
By default, some event screens have label items with predefined click actions and are therefore automatically enabled to accept voice commands. Examples include:
When speaking your commands, RightBooth voice recognition takes the spoken input from the Windows default microphone input device, so you must ensure that you have a working microphone attached to your system. This can be configured in Windows Settings under the section: System--> Sound. Check out this latest training video on Voice Commands: And here is the event file I used in the video. Simply download and save it in the folder: C:\Users\your_user_name\Documents\RightBooth7
Here's an idea for how you might use Voice Input: And here is the event file I used in the video:
Note: The label items containing each of the spoken guest names are positioned off the right hand edge of the Start screen. So in the Screen Editor, if you zoom the view down to 0.7 you will see them. Tips for Improving RightBooth Voice Recognition Accuracy
 1 - Create an information event
 2 - Make the Event Passive You don't want anyone interacting with the event, so you can make it ignore all user input. Note this action is only necessary if you are going to be displaying your event on a touchscreen.
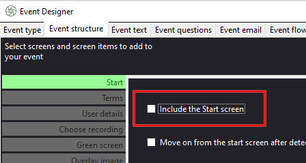 3 - Remove the Start screen
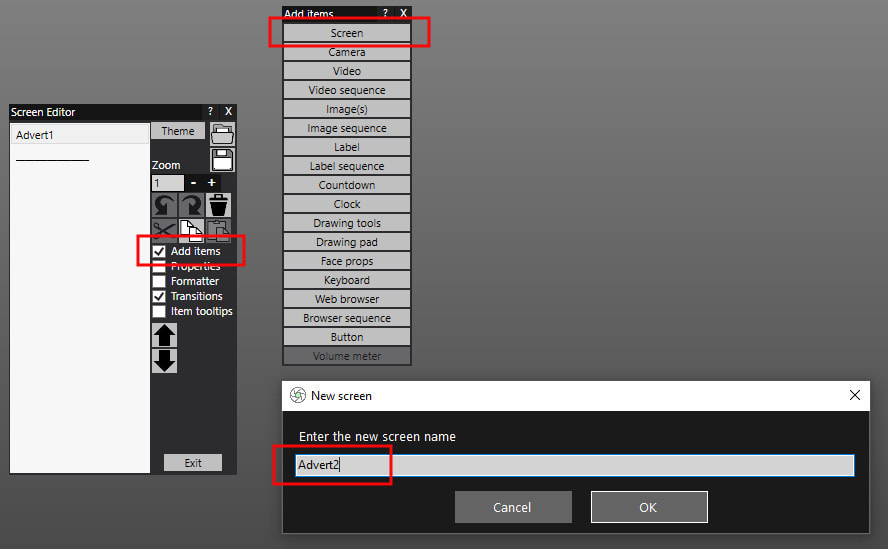
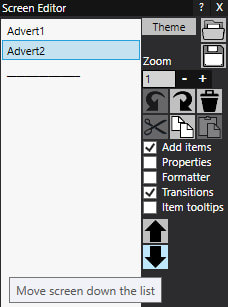
4 - Add some screens to your event This is where you need to plan your screens and get creative. Decide how many screens you require and what you want to show on them. For our example we will show 2 adverts.
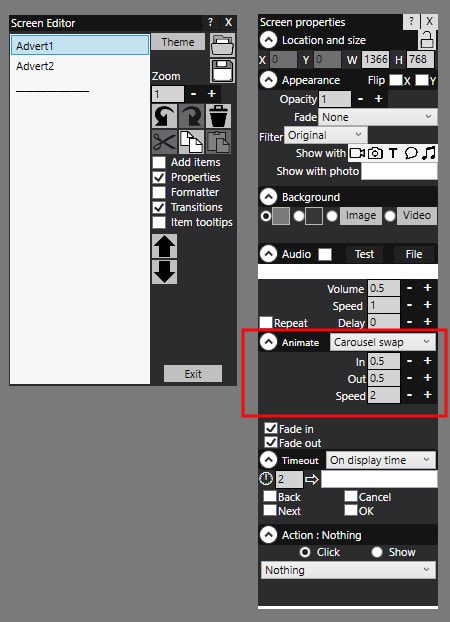
5 - Set the Display Time for each Screen
 Note in the above screen shot, the textbox next to the '4' seconds is empty. By leaving this text box empty, ( when the event is playing ) RightBooth will move on to showing the next screen in the list (Advert2) after 4 seconds. And if you also leave this box empty for Advert2, RightBooth will go back to showing the first screen in the list (Advert1) after Advert2 times out. 6 - Add content to your screens Now you can get creative and add your text, images, videos and or web pages to each of your screens. There are lots of tutorials on our website on how to do this. 7 - Save and Play Your Event In our example, our event will run indefinately, alternating between showing Advert1 and Advert2 for 4 seconds. You are obviously free to add as many screens as you require for your information and advertising kiosk. Further Suggestions Auto advancing video If you are playing a video on one of your event screens and you would like RightBooth to move to the next screen when the video finishes, just set the screen timeout property to: 'On video item'. Here we have added a video item to the Advert1 screen and we have set the screen property to 'On video item': 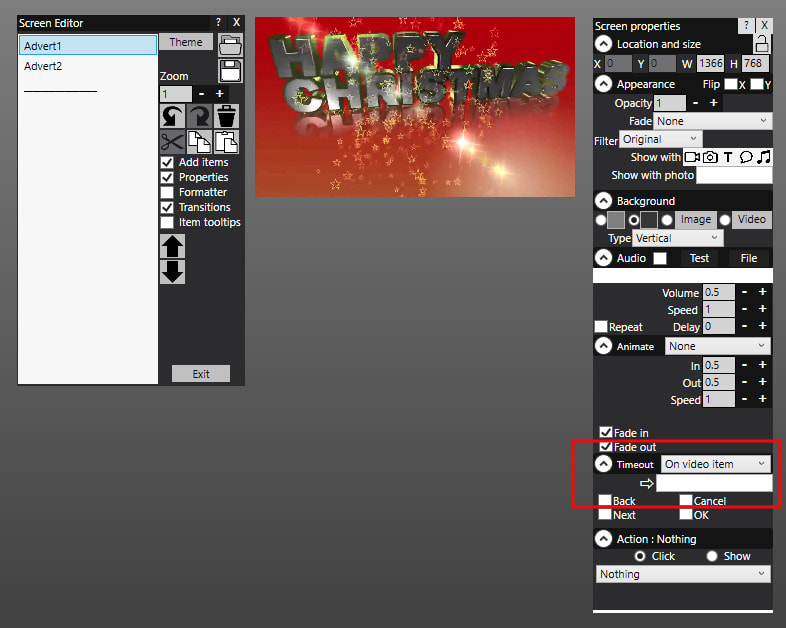 Screen Animations When playing the event, by default RightBooth will simply cut from one screen to another without any animation effects. Try adding an animation to each screen.
 Notes:
Random Ordering of Screens You can name your screens is such a way that RightBooth will display them in a random order. Full details available here: Random screens Updating Screen Content Remotely It is possible to alter the content of your screens without actually stopping the event from playing or from having to physically visit the kiosk. Full details on how to do this can be found here: Making Remote Changes |
AuthorNigel Pearce 
Archives
July 2024
|
||||||||||||
 RSS Feed

|
|