
|
Updated: Jan 2021
Step 2 - Create a Mirror Booth event
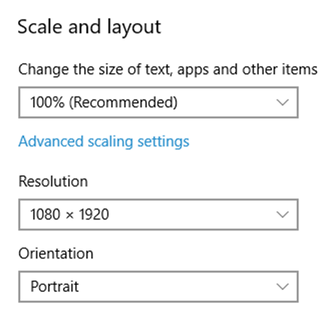
RightBooth will now create a new event file with all event screens sized at 1080 x 1920 pixels, ideal for a mirror booth. Now save the event file, using the Save button on the main RightBooth window. And that's it ! You now have a basic Mirror Booth event. Try it out and see how it works. Now, keeping this event file loaded in RightBooth, let's explain a little bit more about what the app has created for you... The Mirror Booth event has been created for Photo capture only RightBooth has created an event file that simply allows users to take photos. This has been achieved as follows:
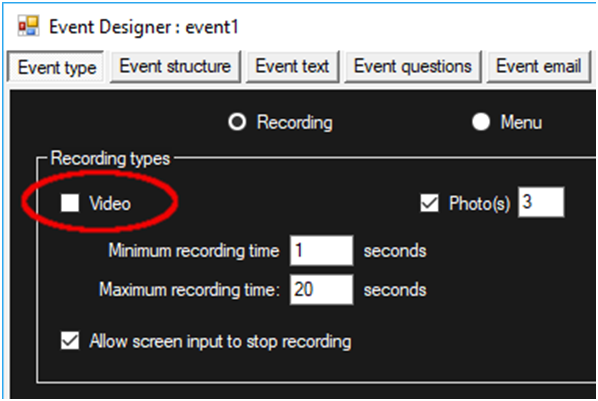 Notice also in the screenshot that the event has been set to capture 3 Photos per user. This number can be anything from 1 to 10. Now in the Event Designer, switch to the Event structure tab, and in the Choose recording section, notice that the option: ‘Include the Choose recording screen’ has been unticked: 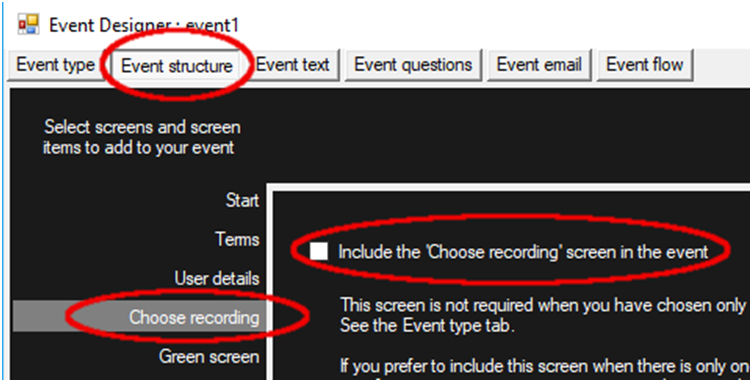 This has been done to prevent the Choose recording screen from being shown when the event is played, because the user will always be capturing photos. The Mirror Booth event has black screen backgrounds As mentioned, mirror booths work best with black screen backgrounds, so all screens in the event have been set to black. If you want to alter the background colour of all screens to black (or any other colour) manually, you can do this as follows: On the RightBooth main window, click the Edit button to go to the Screen Editor where you will be presented with the Start screen. To change the screen background colour, on the Screen editor toolbox, tick the Properties checkbox (as shown in the screen shot below) to reveal the Screen properties toolbox. On the Background section, select the solid colour option (red 1), then click the colour rectangle (red 2) and choose Black from the colour dialog popup window: 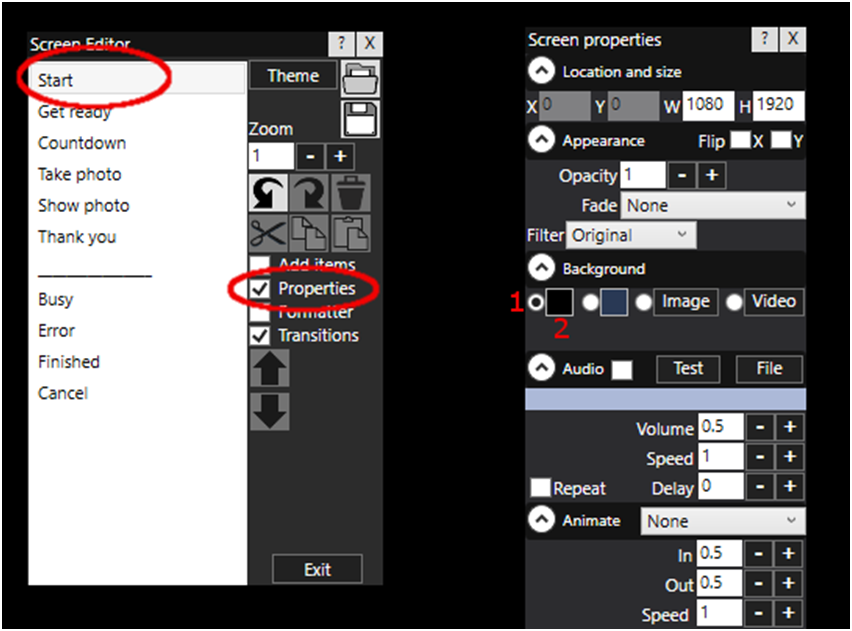 Your Start screen will now have a solid black background with white text on it. You then need to make the same colour change to all other screens in the event. The easiest way to do this is using the Formatter tool. On the Screen Editor toolbox, tick the ‘Formatter’ checkbox to show the Formatter toolbox. On the Formatter toolbox, click the button: Add background to all screens: 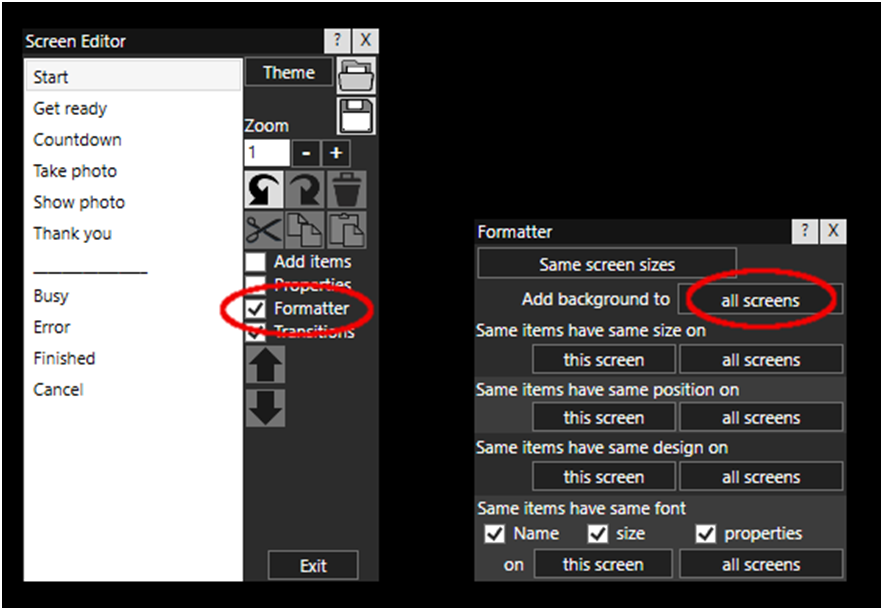 Click ‘Yes’ when asked if you want to continue. All screen backgrounds in the event will now be changed to solid black. Hiding the Live Webcam Feed Again as mentioned at the top of this article you should hide the live webcam feed because users will be looking at themselves in the mirror, so the feed is not required. So RightBooth has automatically removed the webcam feed from the Start screen and has moved the item off the top edge of the other screens (we'll explain why later). Here's how you can manually remove the webcam item from a screen: On the Start screen, click on the webcam item to select it. Then press the Delete key on the keyboard to remove the webcam item from the Start screen. Note: You can also click the Bin tool on the Screen Editor toolbox to delete the item:  Now take a look at the Countdown screen, Get ready screen and Take photo screen. On these screens, rather than removing the webcam item RightBooth has moved it off the top edge of the screen. (We will explain why in a moment). To see this, on the Screen Editor toolbox, reduce the Zoom factor to about 0.5 using the ‘-‘ button. Notice that the webcam item is located above the top edge of the screen (in the light blue area) like this: 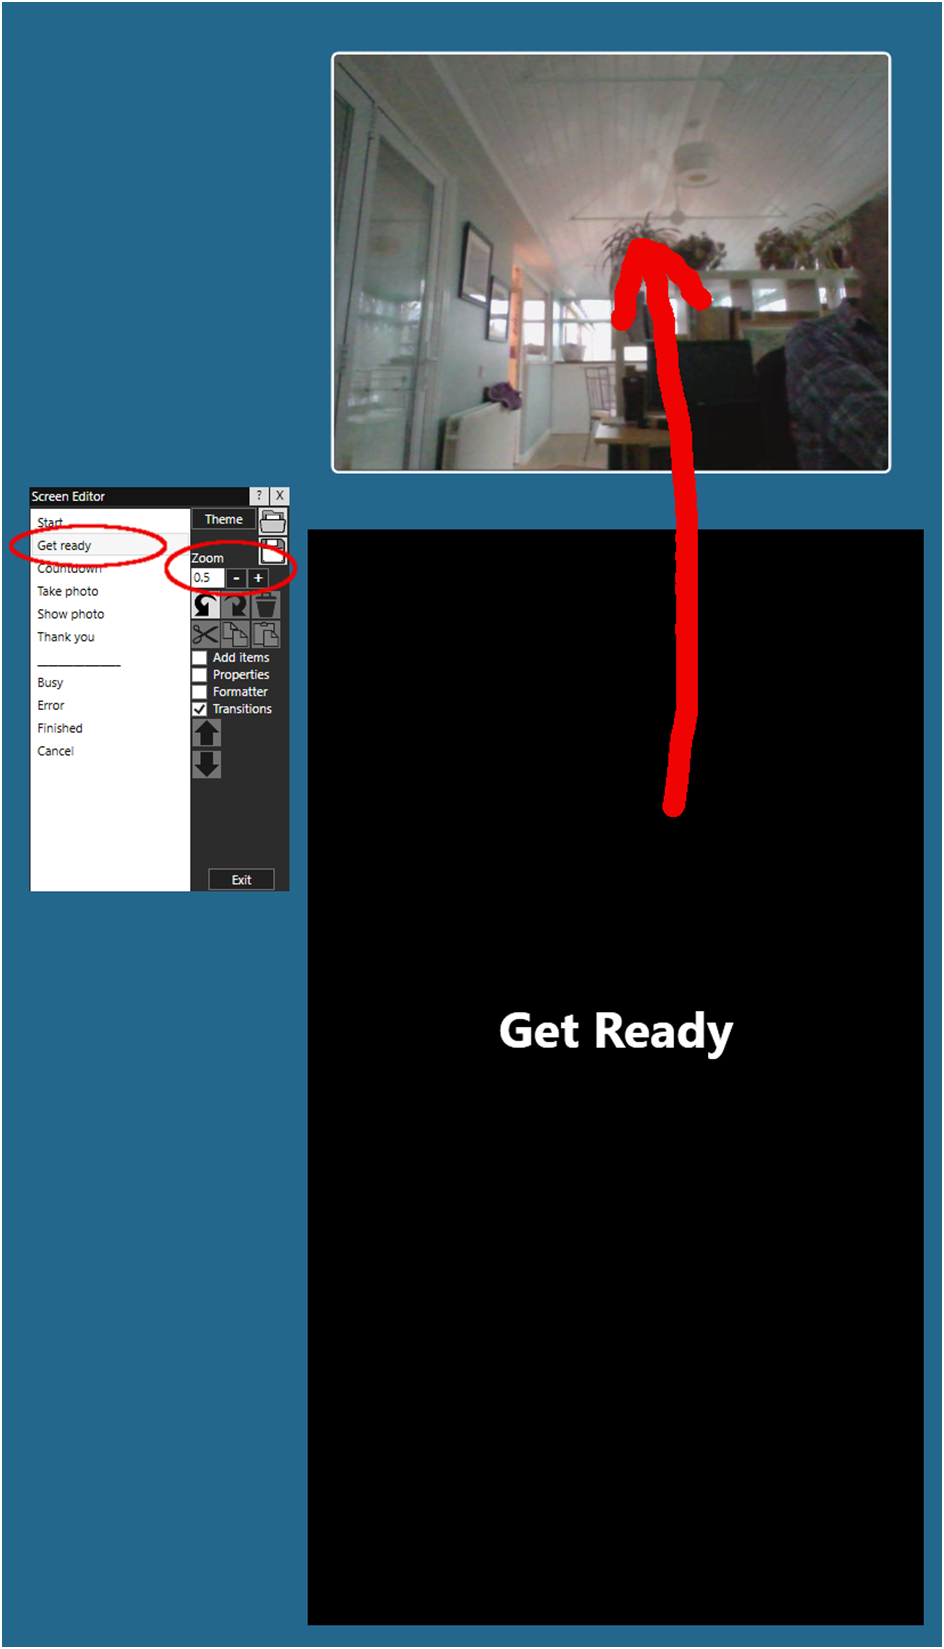 Return the Zoom factor back to 1 and the webcam will now be hidden above the top edge of the display.
The reason for doing this is that when you eventually come to play the event on the mirror booth, when taking photos with the webcam, the webcam needs to be switched on during the photo capture process, so by leaving the webcam item on the Get ready, Countdown and Take photo screens, it will be switched on each time the Get ready screen is shown, and it will remain on while photos are captured. But then it will be turned off again when the system has returned to showing the Start screen, ready for the next user. Using a DSLR camera? If you are using a DSLR (rather than a webcam) to capture photos, no problem, simply set the option to capture photos from the DSLR in RightBooth settings. For more information on how to capture photos using your DSLR, please see the How To section on this website. Tidying Up A few other things that RightBooth has automatically done in the Mirror Booth event: On the Start screen The default text items have been removed from the screen. On the Show photo screen The photo capture placeholders have been arranged below the main photo. On Various Screens RightBooth has added a text sequence item to the Start screen, Take photo screen and Show photo screen, each containing various animated text prompts. Unlimited design potential... RightBooth can automatically create basic Mirror Booth event files. However, you can manually build upon this using the Designer and Editor to include further images, animated GIFs and video prompts to make your mirror booth product really stand out from the crowd. And don't forget you can also include lots of other features on your Mirror Booth, including video recording, overlay selection, video and photo signing, photo printing and user file emailing.
1 Comment
Your comment will be posted after it is approved.
Leave a Reply. |
AuthorNigel Pearce 
Archives
July 2024
|
 RSS Feed

|
|