|
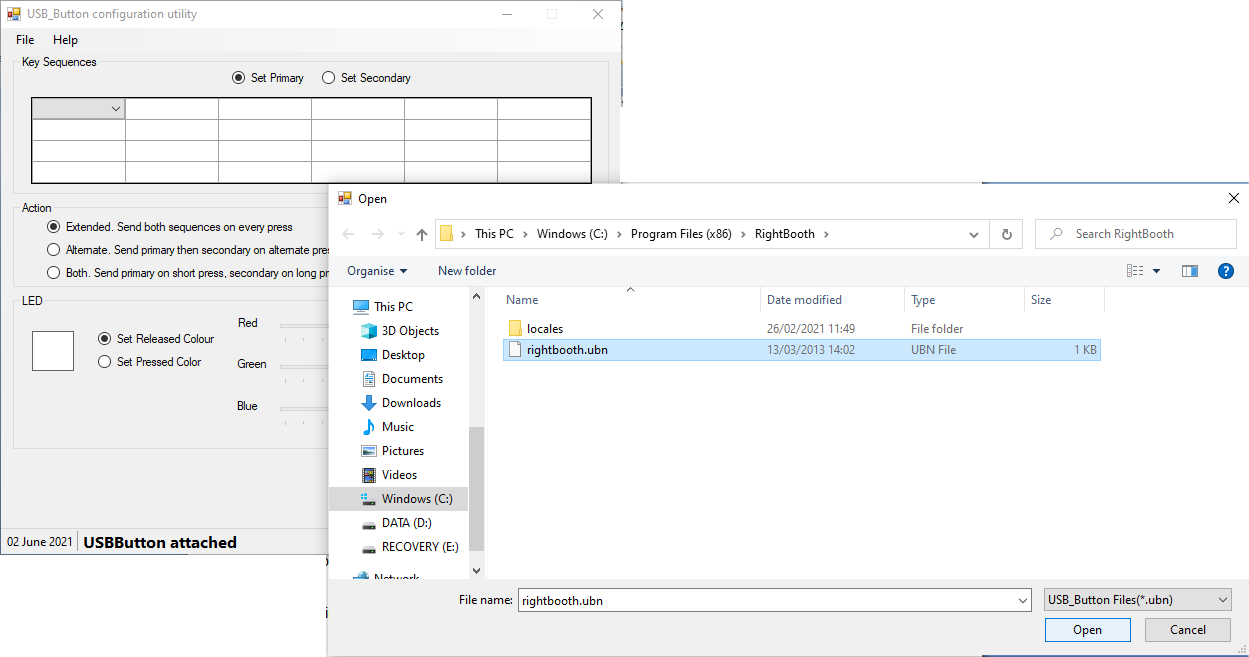
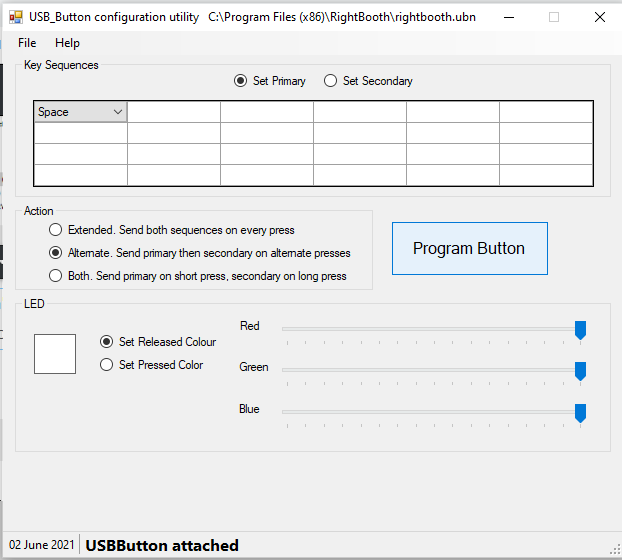
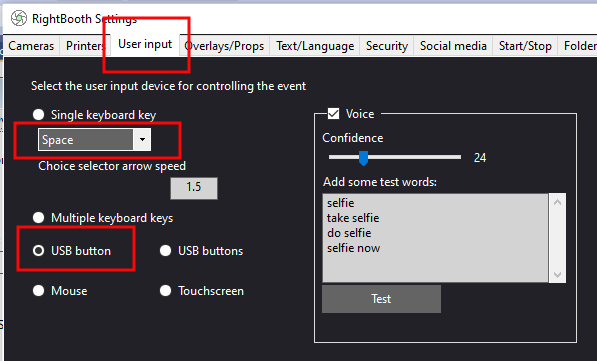
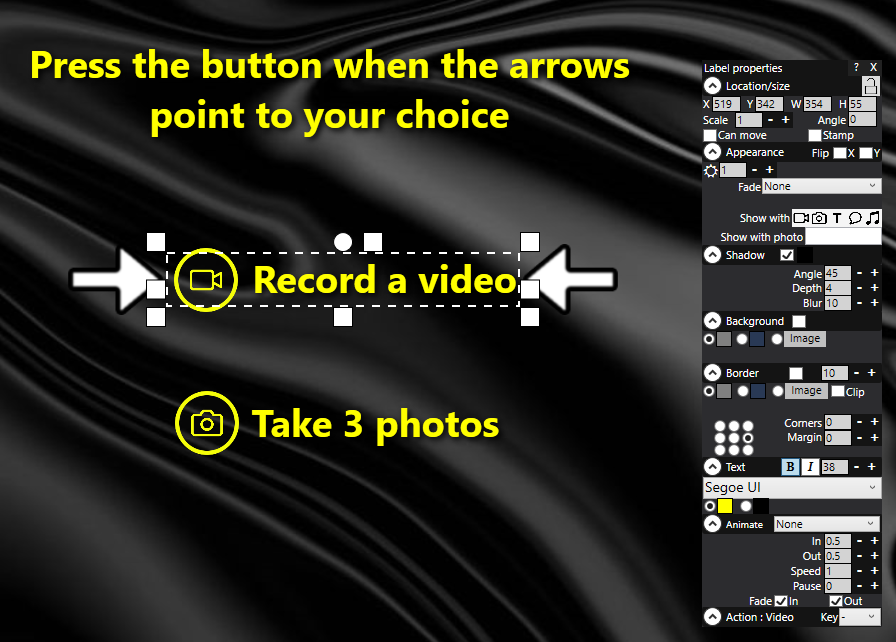
A guide on how to use a single USB button for controlling your RightBooth events. 1 - Buy a USB button. We recommend using this button: www.usbbutton.com 2 - Plug the USB button into a free USB port on your PC. Wait until Windows configures the button for use. 3 - Download and install the USB Button Configuration utility, available from the website link mentioned in 1). 4 - Run the USB Button Utility 5 - Use the File --> Open menu to open the following file: c:\Program Files (x86)\RightBooth\rightbooth.ubn 6 - Press the 'Program Button' button to configure the USB button so that it will send the Spacebar keyboard character to Windows. Note that this is a one time requirement... 7 - Run RightBooth. Go to Settings --> User Input 8 - Select the option 'USB button' and make sure the Single keyboard key is set to 'Space'... 9 - Open your event and go into the Screen Editor. 10 - Look at each screen that has a choice selection and ensure that the selection arrows correctly point at the text choices. If they don't, edit the label items accordingly. In this example screenshot the selected label item has been widened so that it straddles the accompanying button and its text contents have been right justified so that the selection arrows are positioned to the left of the button and to the right of the label item: 11 - Play the event. The arrows will move automatically between the text choices. When the arrows are pointing at your required choice, you can press the USB Button to select the choice.
12 - If the arrows move too quickly between the choices, return to Settings --> User Input and increase the Choice selector arrow speed IMPORTANT: If you need to edit the selection arrows, you must always select the 'left most' arrow. Any changes you make will be applied to both arrows.
0 Comments
Your comment will be posted after it is approved.
Leave a Reply. |
AuthorNigel Pearce Archives
July 2024
|
|


 RSS Feed
