|
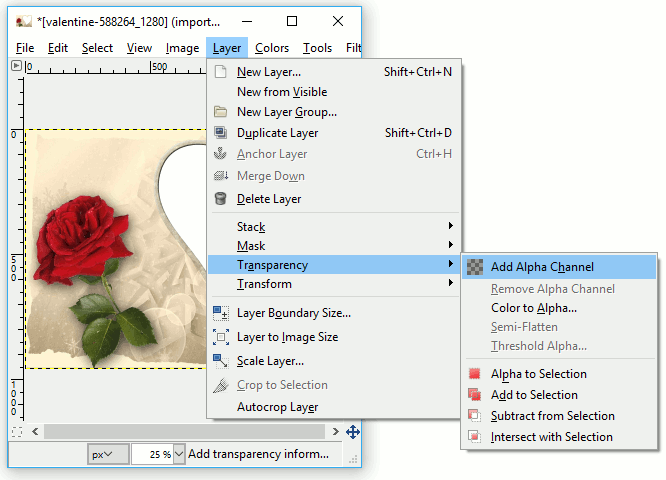
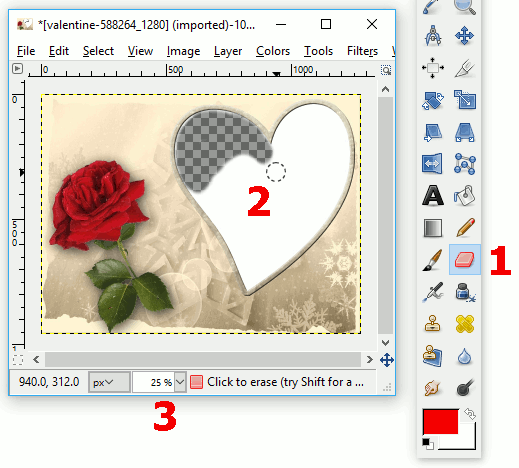
Updated: Jan 2021 You may have already seen the overlay images that are provided with RightBooth. If you have installed the RightBooth Media Library then you will find them in this folder on your computer: C:\Users\Public\Documents\RightBooth7 Library\Images\Overlays All the images in the Overlays folder contain various transparent areas that allow your recorded videos and photos to show through, for example: You can add your own images into the Overlays folder and then use them in RightBooth. This article explains how. 1 - Get Yourself An Image Editing Program This article demonstrates how to create overlay images using GIMP, a free image editing package. If you are unfamiliar with GIMP or image editing, please first read this article 2 – Find An Image There are plenty of places on the Web to find images, including sites like pixabay.com which are all completely free to use. For this tutorial we are using this image (which you’ve probably already seen included in the Overlays folder: Image source: https://pixabay.com/en/valentine-greeting-card-frame-588264/ This image is ideally suited to be edited and altered into an overlay image, allowing the RightBooth event user’s head(s) to appear in the heart shaped photo frame. Download the image and save it onto your computer. Notice that it is a JPG image. 3 – Edit The Image JPG images do not contain any transparent areas so we need to edit the image in GIMP to make the white heart area transparent.
4 Save the Image We need to save the image as a PNG file because PNG images can retain the transparent areas.
Job done.
You now have a new overlay image for use in RightBooth. Now it’s your turn to find some suitable images that you can modify and use as overlays. And don’t forget to seek permission from the image owner if they are not free to use.
0 Comments
Your comment will be posted after it is approved.
Leave a Reply. |
AuthorNigel Pearce Archives
July 2024
|
|


 RSS Feed
